
Web Console Overview
New to the hosted app? Create your first image, connect your provider, and understand provider billing versus workspace storage.
The Go Bananas! Web Console provides a visual interface for managing your image generation workflows.
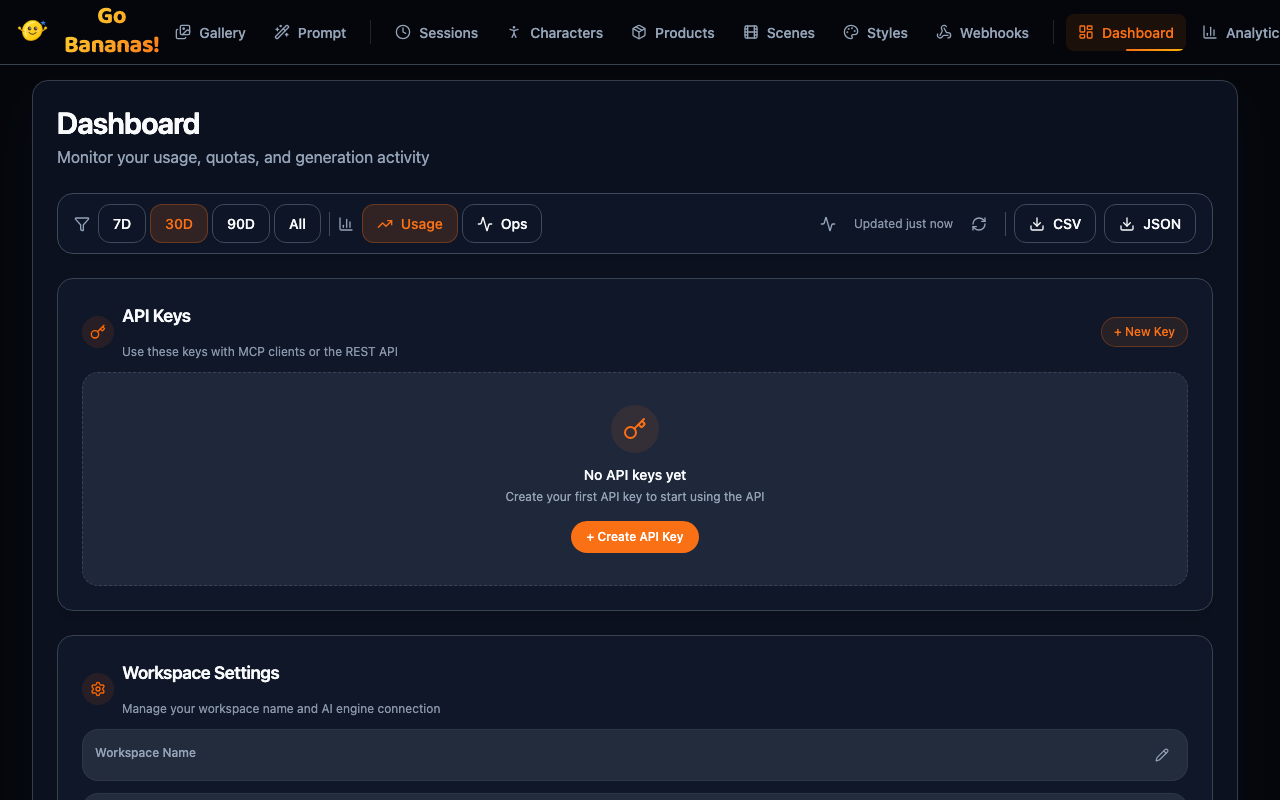
Accessing the Console
Sign in at gobananasai.com/login with your email and password, Google or GitHub. New here? Create an account on the same page and confirm your email. See Accounts and sign-in.
Authentication
After you sign in, pick your workspace in the account menu. If setup is incomplete, follow Create your first image. Workspace owners and managers can manage provider connections in Dashboard → Workspace Settings.
A Go Bananas API key is for client access; it does not replace the workspace’s Gemini or OpenAI provider connection.
Console Views
| View | Purpose |
|---|---|
| Dashboard | Usage statistics, quotas, overview |
| Gallery | Browse, search, manage images |
| Prompt | Generate and edit images |
| Characters | Manage character library |
| Products | Manage product references |
| Sessions | View session history |
| Styles | Manage reusable style templates |
| Scenes | Save and reuse scene presets |
| Analytics | Detailed usage analytics and trends |
| Webhooks | Configure quota notification webhooks |
| Tenants | Tenant management (super-admins) |
| People | User management and team invitations (super-admins) |
| Your account | Your details, download your data, delete your account (7-day grace period). Opened from the account menu |
| Codex subscription | Connect your ChatGPT/Codex subscription with a one-time code and generate with it, or switch to your workspace provider API. Shown as Codex in the sidebar to owners and managers, where the deployment enables it |
| Connect | Setup steps for Claude, ChatGPT, Cursor, VS Code, Claude Code, Codex, Gemini CLI and the terminal. Public page at gobananasai.com/connect (no sign-in needed); the dashboard's Connect Your Tools panel shows the same guide |
Navigation
The sidebar groups the views like this:
| Group | Items |
|---|---|
| Create | Gallery, Prompt, Codex (only where the ChatGPT subscription feature is enabled for the workspace) |
| Library | Characters, Products, Scenes, Styles |
| Insights | Dashboard, Analytics |
| Admin | Sessions, Webhooks, Tenants, People |
Below the groups are Help (these docs), the theme toggle and your account menu. On a phone, the same groups open from the menu button.
The account menu shows who you are signed in as, lets you search and switch workspaces or set a default one, and has Your account, Documentation and Log out. Workspace owners and managers also see Workspace administration; super-admins see People and access.
Who sees what
| Items | Who sees them |
|---|---|
| Gallery, Characters, Products, Scenes, Styles, Analytics | Everyone in the workspace |
| Prompt, Codex, Sessions, Webhooks, Dashboard | Workspace owners and managers (and super-admins) |
| Tenants, People | Super-admins only |
Workspace roles are owner, manager, billing and viewer. Only owners and managers can create, edit and delete content in a workspace.
Key Workflows
See the console in action with these workflow demonstrations:
Image Generation
Enter a prompt and generate stunning AI images in seconds.

- Open Prompt in the sidebar
- Enter your prompt
- Adjust settings (aspect ratio, model, style)
- Click Generate
- View result in Gallery
Conversational Editing
Iteratively refine images with natural language instructions.

- Select an image in Gallery
- Click Edit
- Describe the changes you want
- Apply and iterate
Character Generation
Create consistent characters and use them across multiple scenes.

- Create characters in Characters view
- Define appearance and style
- Generate with character in any scene
Product Marketing
Generate professional product shots with your saved references.

- Add product references in Products view
- On Prompt, open the Products tab and select the product
- Describe the marketing scene
- Generate professional shots
Gallery Management
Browse, search, and organize your image library.

- Browse images in Gallery
- Search by prompt, date, or type
- Switch between view modes
- Open lightbox for details
Mobile Support
The console is responsive and works on mobile devices:
- Touch-friendly navigation
- Responsive grid layouts
- Mobile-optimized forms
- Swipe gestures in gallery
Keyboard Shortcuts
Most shortcuts work in the Gallery and the image lightbox. Press ? in the Gallery to see them all, or read Keyboard shortcuts.
| Shortcut | Action |
|---|---|
Ctrl/Cmd + F | Focus the Gallery search box |
Ctrl/Cmd + K | Show or hide the Gallery filters |
Ctrl/Cmd + A | Select all visible images (Gallery) |
Delete | Delete selected images (Gallery) |
Esc | Close a dialog or the lightbox |
← → | Move between images in the lightbox |
Next Steps
Explore each console view:
- Dashboard → - Monitor your usage
- Gallery → - Browse your images
- Prompt → - Create new images
- Characters → - Build your library
- Products → - Add product references
- Sessions → - View history
- Styles → - Manage style templates
- Scenes → - Save and reuse scene presets
- Analytics → - View detailed analytics
- Webhooks → - Configure notifications
- Tenants → - Manage tenants (super-admins)
- People → - Manage users and teams